
Many years back I wrote an article about how to get old scanners working with Windows 7 x64. I recently upgraded the PC connected to the scanners to Windows 10 and was faced with the same challenge all over again. Amazingly the same tricks worked and both scanners are now working! Below I detail precisely how to achieve this.
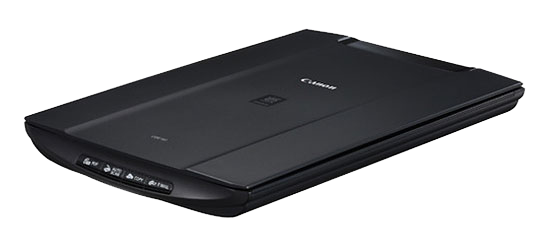
দ্য 2 scanners in question in my case are a Nikon slide scanner (CoolScan IV ED) and a Canon Lide 50 flatbed scanner. There is a modified driver for the Canon which worked with windows 7 and the same driver can be installed on windows 10 via the “have disk” method in device manager, as long as device driving signing is temporarily disabled first. See below for precise step by step instructions.
The Nikon scanner doesn’t have a modifiable driver but I was able to get it working with an old version of Hamrick Vuescan which installs a driver which works with the Nikon scanning software. Newer versions of Vuescan (যখন জন্য অর্থ প্রদান) কাজ করবে, but Vuescan has it’s own app which doesn’t work well for scanning slides, so I wanted to use the Nikon software directly. The older vuescan driver works with this but like the modified Canon driver, device driver signing verification needs to be disabled temporarily to install it.
অক্ষম ডিভাইস ড্রাইভার স্বাক্ষরের
- শুরু ও নির্বাচন সেটিংসের উপর ক্লিক করুন
- Select “update and security”
- পুনরুদ্ধার স্ক্রোল ডাউন
- Under “advanced startup” select “restart”
- In the new interface that appears select “troubleshoot”
- Select “advanced options”
- Select “startup settings”
- পুনর্সূচনা ক্লিক করুন
- When the PC restarts select the option to disable device driver signing enforcement (বিকল্প 7)
ডিভাইস ম্যানেজার মাধ্যমে ক্যানন ড্রাইভার ইনস্টল
- এর কাস্টমাইজড ড্রাইভার সৌজন্যে ডাউনলোড ওয়েব whitenoise or from our downloads page, এবং এটি নিষ্কাশন.
- Right click on “this pc” and select properties
- select “device manager” at top top left
- Expand either “imaging devices” or “unknown devices” to locate the scanner
- Double click to open the device and then in the new window that opens click on the “driver” tab
- Click “update driver”
- Select “browse my computer for drivers”
- Select “Let me pick from a list of available drivers on my computer”
- Click “have disk”
- Browse to the location where the driver is located
- শুধুমাত্র ডিভাইস যা তালিকায় দেখা নির্বাচন করুন এবং পরবর্তী ক্লিক করুন
- There will be a couple of warnings that you need to confirm you want to go ahead
ক্যানন সফ্টওয়্যার স্ক্যান ইনস্টল করুন
- Download CanonScan Toolbox from Canon or from our downloads page
- Extract the files and install the software. You may need to enable compatibility mode
- You should then be able to scan via TWAIN in any application that supports it
পুরোনো VueScan চালক প্রাপ্ত করুন
- I found and used a version of vuescan with the filename vuex6490.exe with a digital signature date of “15 October 2011 13:41:21". Vuescan provide old copies so this can be downloaded directly
- Install the software and let it install the drivers for the scanner.
- You then need to locate and make a copy of these 10 files which should be located inb
C:\VueScan: dpinst32.exe (550,720); dpinst64.exe (676,160); scanners.inf (103,521); vueps32.8ba (73,216); vueps64.8ba (85,504); vuescan.exe (10,599,752); vuescan.ini (105); vuescan.log (29,292); vuetw32.ds (189,952); vuetw64.ds (229,888). The easiest way to do this is to copy the VueScan folder to another location (e.g your desktop or downloads folder) - You should now uninstall vuescan from “programs and features” (in control panel) as we only want the driver not the vuescan software itself.
ডিভাইস ম্যানেজার মাধ্যমে vuescan ড্রাইভার ইনস্টল
- Use the same process as outlined above for the canon drivers but point to the extracted vuescan driver that you copied
নিকন সফ্টওয়্যার স্ক্যান ইনস্টল করুন
- Download the software installer ns403en_vista.exe from Nikon (উদাঃ. থেকে Nikon Australia)
- Extract the files and install the software. You may need to enable compatibility mode
- The Nikon software will recognise the VueScan driver and will enable scanning. You will need to put a slide into the scanner for the scanning options to show up fully in the software.
I expect that the technique used for the Nikon device could be used with other scanners but a simpler solution for most scanners would just be to pay for and use VueScan — it is only because the VueScan software doesn’t work well for slide scanning that I used this convoluted process.
এই সহায়িকার আপনার জন্য কাজ করে তাহলে, please consider buying a copy of vuescan — it is their hard work that has made the driver that you are now using! Vuescan isn’t an unreasonably expensive product and once purchased it will work with multiple scanners.
“Hi James I realise it has been a long while, but I just checked this on windows 11 (build 23H2)…”